Thursday, December 31, 2015

Setting up Couchbase Server to work with Microsoft Active Directory LDAP

Hi all!

So you want to authenticate users access to Couchbase through your Active Directory LDAP service.

Couchbase has that ability.
You can actually map every user to one of three access permissions levels (as for v4.1)
1. Full Admin
2. Read Only
3. No access

I assume the following:
1.You already have an Active Directory up and running
If not, please refer to here or here for setup instructions.
2. You already have Couchbase already installed (on a Linux Distro)
If not, please refer to those guides: RHEL or Debian

As for v4.1 of Couchbase, only the Linux distros support the LDAP, it's not available on Windows nor MacOS.

My setup here is an Azure Windows server 2012 R2 VM with Active Directory and a local Ubuntu 14.04.3 LTS VM with Couchbase v4.1 installed.


In the setting of your Linux Couchbase you will find a tab called LDAP Auth Setup

To fully understand how the LDAP authentication works with Couchbase,
please read Couchbase's documentation.

So first thing first, install the saslauthd
Pay attention if you are using RHEL or Ubutntu, paths and instructions are a bit different.

TL;DR version in Ubuntu
1. sudo apt-get update
2. sudo apt-get install sasl2-bin
3. sudo nano /etc/default/saslauthd
4. Change START=yes, MECHANISMS="ldap"
5. Save and quit (ctrl+x)
6. switch to sudo (sudo -u)
7. change permission for /var/run/saslauthd and /var/run/saslauthd/mux to 755 so couchbase user can access them.
8. cd to /etc folder
9. if saslauthd.conf does not exist - touch it and add 755 permissions.
10. configure the file as follows:

 ldap_servers: ldap://yourmachineaddress:389  
 ldap_search_base: dc=couchbase,dc=org  
 ldap_filter: (sAMAccountName=%u)  
 ldap_bind_dn: CN=[admin user],CN=Users,DC=couchbase,DC=org  
 ldap_password: [admin password]  
 ldap_auth_method: bind  
 ldap_version: 3  
 ldap_use_sasl: no  
 ldap_restart: yes  
 ldap_deref: no  
 ldap_start_tls: no  

ldap_servers is your AD server
ldap_search_base is on what domain you would like to search users (here it's couchbase.org on AD)
ldap_filter is what you want to return
ldap_bind_dn is a user with admin privileges permissions who can search the AD user tree.
ldap_password the admin user password

11. Open Active Directory ports for LDAP, 389 (TCP+UDP), 3268,3269, 636 (UDP)
12. You can test your active directory connection with JXplorer
13. Restart your salsauthd service - sudo service saslauthd restart
14.  Test it! - sudo -u couchbase /usr/sbin/testsaslauthd -u -p mypassword -f /var/run/saslauthd/mux
15. if you have permissions and set it all up as above you should get a success message.
the username and the password here are the ones you want to check, not the ldap admin.

now let's use it on the Couchbase console!
1. Login to your cluster management console and hit settings -> LDAP Auth setup.
2. Enable LDAP
3. Choose your default behavior - if you don't specify the username anywhere
4. Write down some users or groups in each box
5. Hit save
6. Test it (on the right)
7. If everything is ok - you should get something like "user 'x' has 'Full Admin' access
because I've listed that user under the Full Admin.


8. now sign out and try logging in with the Active Directory Credentials.


If I will get the password wrong - I won't be able to access, as expected.


In case you AD server is unreachable, you would still be able to log in through your regular Couchbase accounts.


Thats all!
Hope you enjoyed.

Roi.


Thursday, December 24, 2015

Couchbase Mobile - Part 1 - Couchbase lite & P2P

Hi all
Couchbase Mobile solution is thrilling innovative and yet fairly simple - it just works!

In this blog we will cover the Couchbase Lite peer-to-peer capabilities, how
you can very easily, to connect two Couchbase Lite databases from two different
devices together using the built in replication.

In general the Couchbase's Mobile solution consists of 3 parts,
1) Couchbase Server
2) Sync Gateway
3) Couchbase Lite

Couchbase server holding all the data and can be synced through Sync Gateway to the Embedded Couchbase lite and vice versa.

On this part I will focus on the Couchbase Lite and how to set up P2P replication on .Net platform (but it's pretty much the same on every other platform)

So before we get into some coding, what is Couchbase Lite?
Couchbase lite is an opened-source, embedded document database with built-in abilities of Key/Values store, Indexing (aka Views), and above all - Replication.
Replication is what making that little Database so special.
I can replicate itself to the sync gateway or to any other Couchbase Lite database,
It features security through authentication and segregation of data from one device to another via concept that called channels.

What is replication? as it sounds - duplicate\copy data from one local database to another target, which can be either another local database or the sync gateway.
The API which the replication is using is basically a REST API, which every Couchbase lite is implementing.

So let's build a simple App that replicates data between two peers!
as I said, I've used C# .Net here (don't run away :) ), but the code is actually pretty much the same in Java.
To properly test that project, you might have to use two computers in a network.
but, because we will create the database locally in the folder of the app, a copy to a different location and using separate ports will be ok as well.

First of all, Open Visual Studio 2015 (can be community) as an administrator, In a simple WPF form.

right click on References -> Manage Nuget Packages...

Next, add the Couchbase Lite which is available via nuget package.


Search for Couchbase Lite and install the latest Couchbase.Lite and Couchbase.Lite.Listener.
at the time of the writing of this blog, the latest is 1.1.2.

Once installed, Copy and paste the following code to your MainWindow XAML page.

 <Window x:Class="CouchbaseP2P_Blog.MainWindow"  
     xmlns="http://schemas.microsoft.com/winfx/2006/xaml/presentation"  
     xmlns:x="http://schemas.microsoft.com/winfx/2006/xaml"  
     xmlns:d="http://schemas.microsoft.com/expression/blend/2008"  
     xmlns:mc="http://schemas.openxmlformats.org/markup-compatibility/2006"  
     xmlns:local="clr-namespace:CouchbaseP2P_Blog"  
     mc:Ignorable="d"  
     Title="Couchbase Lite P2P Example" Height="350" Width="525">  
   <Grid>  
     <Grid.ColumnDefinitions>  
       <ColumnDefinition Width="auto"/>  
       <ColumnDefinition Width="100"/>  
       <ColumnDefinition Width="*"/>  
     </Grid.ColumnDefinitions>  
     <Grid.RowDefinitions>  
       <RowDefinition Height="auto"/>  
       <RowDefinition Height="*"/>  
     </Grid.RowDefinitions>  
     <StackPanel Grid.Row="0" Grid.Column="0">  
       <TextBlock Text="Replicate to (address): " Margin="1"/>  
       <TextBlock Text="Replicate to (port): " Margin="1"/>  
       <TextBlock Text="Listen On Port" Margin="1"/>  
       <Button Content="Start Replicating" Click="StartReplcatingClick"/>  
       <Button Content="Start P2P Listener" Click="StartListenerClick"/>  
     </StackPanel>  
     <StackPanel Grid.Row="0" Grid.Column="1">  
       <TextBox Text="{Binding ReplicateToAddress}" />  
       <TextBox Text="{Binding ReplicateToPort}"/>  
       <TextBox Text="{Binding ListenOnPort}"/>  
       <TextBlock Text="{Binding IsReplicating}" Margin="1"/>  
       <TextBlock Text="{Binding IsListening}" Margin="1"/>  
     </StackPanel>  
     <StackPanel Grid.Column="0" Grid.Row="1" Margin="0 10 0 0">  
       <Button Content="Insert" Click="InsertDocumentClick" />  
       <Button Content="Read" Click="GetDocumentClick" />  
     </StackPanel>  
     <StackPanel Grid.Column="1" Grid.Row="1" Grid.ColumnSpan="2" Margin="0 10 0 0">  
       <TextBox Text="{Binding DocumentId}" Margin="1"/>  
       <TextBox Text="{Binding DocumentText}" TextWrapping="Wrap" AcceptsReturn="True" MinHeight="100"/>  
     </StackPanel>  
   </Grid>  
 </Window>  
   

That code above, should look similar to the following output


Next we need to connect the XAML doc to the CodeBehind.
That sample is not MVVM for simplicity - but I did used binding.

First lets initialize the Database and set it to be created locally in our working folder,
We will call that method from the constructor.
Steps are,
  1.  Get the path where you want your database to be created
  2. Create manager with that path
  3. Initialize Database with the manager.
Note: the const DB_NAME in our case will be "sampledb" and it must have all lowercase letter.


     private void InitializeDatabase()  
     {    
        _dbPath = new DirectoryInfo(Environment.CurrentDirectory);  
        _manager = new Manager(_dbPath, ManagerOptions.Default);  
        _database = _manager.GetDatabase(DB_NAME);  
     }  

Add code to start Couchbase Lite Listener
Just create a new listener with the wanted port and the desired database name.

     private void StartListenerClick(object sender, RoutedEventArgs e)  
     {  
       _listener = new CouchbaseLiteTcpListener(_manager, ushort.Parse(ListenOnPort), DB_NAME);  
       _listener.Start();  
       IsListening = "Listening";
     }  
   

And lastly - the code for our replication
Steps are:

  1. Create pull/push replication to address and port
  2. Decide whether you want continuous replication of one time
  3. Start the replication.

     private void StartReplcatingClick(object sender, RoutedEventArgs e)  
     {  
       try  
       {  
         if (_pulls == null) _pulls = new List();  
         if (_pushes == null) _pushes = new List();  
   
         var pull = _database.CreatePullReplication(CreateSyncUri(ReplicateToAddress, int.Parse(ReplicateToPort), DB_NAME));  
         var push = _database.CreatePushReplication(CreateSyncUri(ReplicateToAddress, int.Parse(ReplicateToPort), DB_NAME));  
   
         pull.Continuous = true;  
         push.Continuous = true;  
   
         pull.Start();  
         push.Start();  
   
         _pulls.Add(pull);  
         _pushes.Add(push);  
   
         IsReplicating = "Replicaing!";  
       }  
       catch (Exception ex)  
       {  
         MessageBox.Show(ex.Message);  
       }  
     }  
   
   
     private Uri CreateSyncUri(string hostname, int port, string dbName)  
     {  
       Uri syncUri = null;  
       string scheme = "http";  
   
       try  
       {  
         var uriBuilder = new UriBuilder(scheme, hostname, port, dbName);  
         syncUri = uriBuilder.Uri;  
       }  
       catch (UriFormatException e)  
       {  
         Debug.WriteLine(string.Format("{0}: Cannot create sync uri = {1}", dbName, e.Message));  
       }  
       return syncUri;  
     }  

Lets add a bit of code for Insert and Get

     private void InsertDocumentClick(object sender, RoutedEventArgs e)  
     {  
       if (string.IsNullOrWhiteSpace(DocumentId))  
       {  
         MessageBox.Show("Please specify ID");  
         return;  
       }  
   
       var document = _database.GetDocument(DocumentId);  
   
       var properties = JsonConvert.DeserializeObject<Dictionary<string, object>>(DocumentText);  
       var revision = document.PutProperties(properties);  
   
     }  
   
     private void GetDocumentClick(object sender, RoutedEventArgs e)  
     {  
       var doc = _database.GetDocument(DocumentId);  
   
       DocumentText = JsonConvert.SerializeObject(doc.Properties, Formatting.Indented);  
     }  

All we have to do now is to connect all the bindings you see in the XAML page and to implement INotifyPropertyChanged

Here is the full Code Behind
The full project can be found on Github

Now, in order to use it and test your replication, follow the following steps:

  1. Copy your executable folder to 2 different folders (i.e. Client1 and Client2)
  2. Start both clients under Administrator privileges
  3. Configure Client1 listening Port as 49840
  4. Configure Client2 listening Port as 49841
  5. Configure Client1 replication address to localhost and port 49841
  6. Configure Client2 replication address to localhost and port 49840
  7. Once it started replicating, Add a sample JSON with an ID on Client1 and test it on Client2
    and vice versa.


That's all!
We've built our first Couchbase lite replication in c# without all the fuss and hard work of the replication logic!

Next time - A bit more of Coucbase lite replications and deep dive into views.

Please check API, and quickstarts here

Merry xmas!
Roi.


Thursday, November 26, 2015

Using the Spark Connector for Couchbase - Part 1

Hi all!

This is the first post from a series of how using Couchbase with Apache Spark.
In this post I will explain how to set up the environment, and how to use Spark with Couchbase in the simplest form.
In the next posts we will continue on to the SparkSQL with N1QL world, and the exciting Spark Streaming with DCP and more.

Our world, "Big Data", is divided.
As obscure as Big Data may sound – and is, there are 2 major parts on every data analysis.
The first is the operational side, That is what you need in order to get the work done – in real time those are Databases such as Couchbase.
The Second part is the heavy lifting of aggregation large amount of data,
those are platforms such as Apache Hadoop or Spark.

Couchbase integrates with both in order to achieve the full solution, In that post and in others to follow – I will work you through how to do you first steps and more, integrating your Couchbase server – with Spark – with ease.

I'm assuming that you already know at least a little bit on Spark,
But if not – in one sentence  Apache Spark is an open source cluster computing framework.
It’s main Data structure call RDD and I’m encouraging you to read the Spark developer guide.

The demo we are going to build will be in Spark “Native” language, which is Scala,
Don’t panic, that is fairly simple!

Software needed:
Java: 1.8
Scala: 2.10.4 (important!)
Couchbase: 4.0 with travel-sample bucket installed
Spark: 1.5.x or greater

So first thing first.
If you already know Spark or Scala you can skip the set up phase.


Setting up the Project
Let's open the IDE and start a new project of type Scala with SBT


Hit next and choose the name of the project, Project SDK (at least 1.7) SBT version (whatever you have it’s fine, here I’ve used 0.13.8) and the Scala Version as 2.10.4 (any 2.10 will be fine).

Check the auto-import and click finish.


Next, set up the build.sbt file under the module root.
SBT stands for Scala Build Tool, and function also as a dependencies resolver, A bit like Maven. It also connects to the same repository as Maven.
After you define the properties on this file, the SBT plugin will download the required dependencies.

The simple structure or the SBT is as follows:
1) name of the project “name := someProjectName”
2) version of your project “version := 1.0”
3) Scala version which you’ll be using “scalaVersion := “2.10.4”
4) list of dependencies (from maven repository)     
            “libraryDependencies ++= Seq( “groupId” % “artifactId” % “revision”)”

our sbt file will look like that:
name := "SparkCouchbase"

version := "1.0"

scalaVersion := "2.10.4"

libraryDependencies ++= Seq ("org.apache.spark" % "spark-core_2.10" % "1.5.1",
                            
"org.apache.spark" % "spark-sql_2.10" % "1.5.1",
                            
"org.apache.spark" % "spark-streaming_2.10" % "1.5.1",
                            
"com.couchbase.client" %% "spark-connector" % "1.0.0")
note:  the double %% means that the Scala version will be taken from the variable defined in scalaVersion

the dependencies are as follows:
  1.  The Spark code dependency compiled for Scala 2.10 in version 1.5.1
  2.  The Spark SQL dependency compiled for Scala 2.10 in version 1.5.1
  3.  The streaming for Spark compiled for Scala 2.10 in version 1.5.1
  4. The great Couchbase connector to Spark, compiled for Scala 2.10 (from the scalaVersion) in version 1.0.0
for more about dependencies look here

Next, we need to take care on the directory structure.
If we don’t set the correct structure, the SBT plugin won’t be able to compile our project.

So create new Directory under the module named src/main/scala,
and mark the Scala folder as sources (bluish colored).

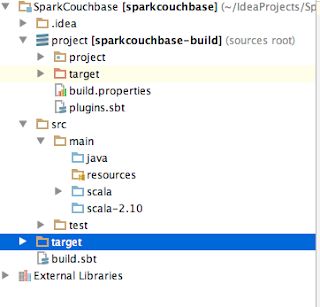
Your project structure should look more or less as follows:


Now after we set everything up it’s time for some coding!


Coding
Finally, some coding.
After you see that the little bar of the sbt has finished downloading the dependencies package you can start writing your program.

First make sure that you already have the Couchbase server installed with the travel-sample bucket.

Now, create a new Scala Object in the Scala source folder with the name of your liking,
I chose SparkCouchbase.scala

Next, create a main function so your code will look like that

 object SparkCouchbase {  
  def main(args: Array[String]): Unit ={  
   
  }  
 }  

So far, what we’ve created here is an Object (think of is as a singleton class), and a method main which gets an array of String and return Unit (which is basically nothing)

Now we need to add the sparky flavor.
In order to do so, we need to add some imports that were downloaded earlier by the SBT auto import.
We need the basic spark package
import org.apache.spark._

we need the basic Couchbase to spark connector package
import com.couchbase.spark._

and Json document and object extension packages
import com.couchbase.client.java.document.JsonDocument

import com.couchbase.client.java.document.json.JsonObject

4 imports in total, plus we need the spark init and configuration, which defining the application name, spark cluster location, what bucket we want to connect to in Couchabse, or the node addresses.
Finally, we must have the SparkContext, in order to use spark framework
so our code will look like that,
please not, if you don’t specify a bucket – the connector will go to the default bucket, and if you don’t specify an address for the nodes, it will try to find Couchbase in the localhost (127.0.0.1).

 import org.apache.spark._  
 import com.couchbase.spark._  
 import com.couchbase.client.java.document.JsonDocument  
   
 import com.couchbase.client.java.document.json.JsonObject  
    
 object SparkCouchbase {  
  def main(args: Array[String]): Unit ={  
    val sparkConf = new SparkConf().setAppName("CouchbaseTricks")  
                    .setMaster("local[*]")  
                    .set("com.couchbase.bucket.travel-sample","")  
                    .set("com.couchbase.bucket.default","")  
                    .set("com.couchbase.nodes","127.0.0.1")  
   
    val sc = new SparkContext(sparkConf)  
   
  }  
 }  

So we set the app name, CouchbaseTricks, the cluster (local cluster-testing with x number of nodes as the number of cores), which buckets we want to connect to (travel-sample, default) and the nodes in the cluster.

Now we need to do something with it. Like Getting some documents.
We will do it using the couchbaseGet from the context.

Let’s get some major airports: Heathrow, SF international and Los Angeles international and others, and print their code and name with country.
Then save it back to Couchbase, default bucket, as our major airports.

We will use two methods from the Couchbase connector, the couchbaseGet and saveToCouchbase.
The first get a scala sequence of documents from Couchbase and parallelize them (making them an RDD), this method under your spark context.
The Latter saves an RDD to Couchbase.

Let’s look at the code and break it down a bit

   val airportsSeq = Seq("airport_507", "airport_3469", "airport_3484", "airport_3797", "airport_3576", "airport_502", "airport_1382") // Heathrow, SFO, LAX, JFK, MIA, LGW, CDG  
   val airports: RDD[JsonDocument] = sc.couchbaseGet[JsonDocument](airportsSeq ,"travel-sample" )  
   
   val airportsByCountry = airports.map(airport => (airport.content().getString("country"), 1)) // map  
   val majorAirportCount = airportsByCountry.reduce((a,b) => ("Total airport Number", a._2 + b._2))  
   
   airports.map(myDocument => {  
    val id = "mymajorairports::2015::" + myDocument.id()  
    val content = JsonObject.create().put("name", myDocument.content().getString("airportname"))  
                     .put("country", myDocument.content().get("country"))  
                     .put("code", myDocument.content().getString("faa"))  
    JsonDocument.create(id, content)  
   }).saveToCouchbase("default",StoreMode.UPSERT)  

So now we've just wrote our first Spark application with Couchbase (or maybe ever!).
Simple Spark init, simple reduce function, with get and set to the Couchbase cluster.

Next time, on those foundations, we will build another a bit more complicated solution.

Roi.

Monday, November 9, 2015

NoSQL Document DB's Joins rundown Couchbase 4.0 vs MongoDB 3.2

Hi all,

There is a lot of heat in the NoSQL (Not Only SQL) realms lately.
Especially if we take the Document databases, which are based on JSON to store data.

Little less than a week ago MongoDB came out with some significant release called in the misleading name "3.2" they've added some quite interesting features, one interesting feature is joins. That version, by no mean is a minor version.
The latter were also introduced by Couchbase in the 4.0 major release which included many new features and the most prominent is probably the N1QL language - which is basically a SQL for JSON, which released in early October 2015.

It's as SQL as it gets for NoSQL databases, it more or less a super-set and a subset of SQL as it has some features that does not apply to relational DB - such as NEST & UNNEST of documents,
As of NEST, think of it, as promoting an array inside a documents to it's own "SQL table", on which we can perform queries.

The N1QL language is just another mean of accessing and querying data from Couchbase, in addition to Key-Value system and the View mechanism (the Map-Reduce).

One of the most talked about feature is of course join.
Joining 2 or more documents to one reduces the amount of traffic on the network causing faster response times by the application consuming the data.

So while Couchbase were following the rule "use what you already know" with the N1QL,
the Mongo team suggested another approach to the join,
the went on an introduced another keyword called $lookup,
While that works perfectly - it's not neat, and you will catch some learning curve on the way to perfection, while on Couchbase you just do - SQL joins.

Both DB's join feature is available as community & enterprise editions feature.

So let's join!

In Couchbase,
Let’s use the "travel-sample" that is bundled with it,
I have a route document which looks like that:
  {
    "airline": "AF",
    "airlineid": "airline_137",
    "destinationairport": "CDG",
    "distance": 573.0051071016999,
    "equipment": "E90 AR8 E70",
    "id": 10007,
    "sourceairport": "TRN",
    "stops": 0,
    "type": "route"
  }

I would like to check, which airline corresponds to the route.
which portrait with the following document:
{
      "callsign": "AIRFRANS",
      "country": "France",
      "iata": "AF",
      "icao": "AFR",
      "id": 137,
      "name": "Air France",
      "type": "airline"
    }

Up until now, the way I could "join" those two documents, was by code in my application.
take the first document, figure out the airlineid field, then go back and get the airline document by id.
So while it's still possible to do it, N1QL introduced the concept of join. 

and that is the Query:

SELECT airline.*, route. Airline, route.airlineid, route.destinationairport, route.distance, route.equipment, route.id, route.sourceairport, route.stops, route.type
FROM `travel-sample` route
JOIN `travel-sample` airline ON KEYS route.airlineid
WHERE route.id = 10007

notes about that query above:
1)  I would recommend of not using "star" in your application, but for testing purposes only
2) notice the back tick in the bucket name, this is not an apostrophe.

of which the result is:
a merge of those two documents

  {
    "airline": "AF",
    "airlineid": "airline_137",
    "callsign": "AIRFRANS",
    "country": "France",
    "destinationairport": "CDG",
    "distance": 573.0051071016999,
    "equipment": "E90 AR8 E70",
    "iata": "AF",
    "icao": "AFR",
    "id": 10007,
    "name": "Air France",
    "sourceairport": "TRN",
    "stops": 0,
    "type": "route"
  }

or if we want all of the documents just remove the route.id.
Pure plain SQL.

we can do it programmatically, via the cbc-linq command line, or through the Query Workbench (CBQ) which is currently under developer preview (expected to be released on next Couchbase release).

In MongoDB
We can only do join programmatically with the aggregation pipeline.
Note, that in Couchbase we are joining on keys, and in Mongo on fields.

Assume the following changes:
1) We have two collections, one for routes, and one for the airlines.
2) The field "id" in the airline document is "airline_137" and not just 137, 

{
      "callsign": "AIRFRANS",
      "country": "France",
      "iata": "AF",
      "icao": "AFR",
      "id": "airline_137",
      "name": "Air France",
      "type": "airline"
    }

So the lookup will look like that: 

db.routes.aggregate([
                                    { $match: 
                                                id: 10007
                                    }},
                                    { $lookup: {
                                                from: "airlines"
                                                localField: "airlineid"
                                                foreignField: "id"
                                                as:  "combined_airline_doc"
                                    }}
                                    ]);

The table below compares the two databases join wise:
Couchbase 4.0
Mongo 3.2
Complexity
Simple (SQL joins)
Complex (new language)
Syntax
Similar to SQL joins
New $lookup keyword
Join type
Left Outer joins\inner
Left outer joins\inner
Learning curve
Flat (SQL)
Steep (new query language)
Functionality
Good
Good
Query path
Query Service, Split across the cluster, or with MDS do not load on data nodes
Primary Shard
the pipeline commands distributed workload with scatter gather (the gather on one shard)
Join on
Within or with other buckets
collections
Version
Community
Community


Limitations with MongoDB joins:
  • Only in Aggregation pipeline, programmatically.
  • Right collection for $lookup cannot be sharded (only primary shard contains the unsharded collection) – implementation limitation
  • Indexes are used only in the first state of the pipeline – before manipulation data
  • No right outer joins
Limitation with Couchbase joins:
  • No Right outer joins
  • Joins are only on the keys (as in key-value or object-id)

So this was a light roundup on the new join features on the 2 biggest document databases here.
As for the winner here in that round, it seems like Couchbase wins the trophy here, in terms of usability, testability, tools,  ease of use and distribution.


Hope you've enjoyed.
Roi.